
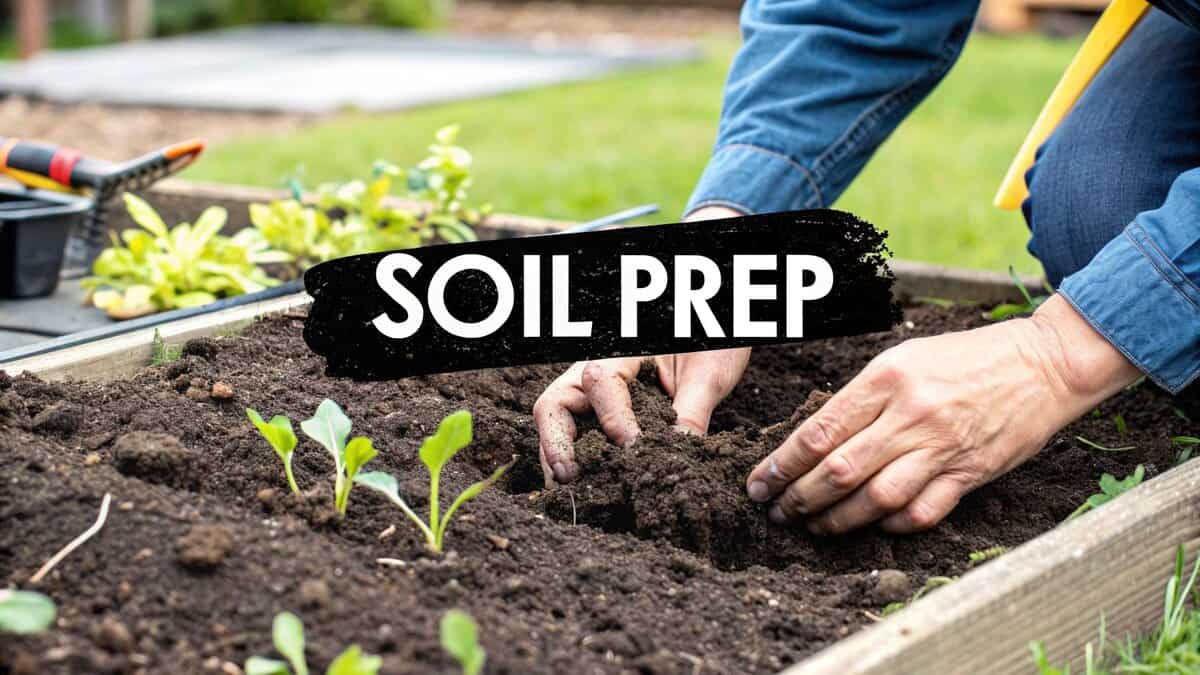
When you’re getting ready to plant, the first step is to prepare the soil. This means clearing the area, figuring out its composition and pH level, and then mixing in the right organic goodies like compost to boost its structure and fertility.
Doing this ensures your soil hits that sweet spot of drainage, aeration, and nutrients. You’re not just moving dirt around—you’re building a living foundation for your entire garden.
Contact us here for quotes and Bookings.
The Secret to a Successful Garden Is Under Your Feet
Before you even dream about seeds or seedlings, the most important work is happening right under your feet. It’s easy for new gardeners to get caught up in sunlight and watering schedules, but they often miss the most critical piece of the puzzle: healthy soil. Honestly, getting your soil right is the single best investment you can make to avoid future headaches like stunted growth, pests, and diseases.
Think of soil prep less as a chore and more as creating a vibrant ecosystem. It’s the essential groundwork for a garden that doesn’t just hang on, but absolutely thrives.
Why Your Soil Matters So Much
That patch of ground you’re looking at is a complex world filled with minerals, organic matter, water, air, and billions of tiny living organisms. It’s this delicate balance that determines how well your plants can get everything they need to grow strong and healthy.
A well-prepared garden bed gives you several huge advantages:
- Better Root Growth: Soil that is loose and crumbly—what gardeners call friable—lets roots spread out effortlessly. This anchors the plant firmly and allows it to seek out water and nutrients without a fight.
- Balanced Moisture: Good soil structure is a game-changer. It prevents the soil from becoming a waterlogged bog after a heavy rain but still holds on to enough moisture to keep plants happy between waterings.
- A Steady Supply of Nutrients: When you amend your soil, you’re essentially setting up a slow-release buffet of essential nutrients that will feed your plants for months to come.
- Natural Pest and Disease Control: Healthy soil is teeming with beneficial microbes. These good guys help suppress harmful pathogens, leading to plants that are naturally more resilient.
The quality of your soil is a direct reflection of the health of your plants. If you start with a weak foundation, you’ll always be playing catch-up, no matter how much you water or fertilize later.
This guide is all about giving you the practical steps to turn any patch of ground into a gardener’s dream. Once you understand your soil’s unique makeup, you have the power to shape your garden’s future. For even more tips on creating incredible outdoor spaces, feel free to explore our full gardening blog.
Get to Know the Ground You’re Working With
Every great garden starts with the soil. Before you ever think about adding compost or fertilizer, you have to play detective and figure out exactly what you’re dealing with. The good news is, you don’t need a fancy lab coat to get started. Your own two hands can tell you an incredible amount about your garden’s foundation.
This first look is a crucial part of learning how to prepare soil for planting the right way.
Let’s start with a classic trick: the squeeze test. Just grab a handful of your garden soil—it should be slightly damp, like a wrung-out sponge, not sopping wet or dusty dry. Now, make a fist and give it a good squeeze.
What happens next is your first big clue.
- Does it form a tight, dense ball that stays together? That’s the signature of heavy clay soil.
- Does it feel gritty and fall apart the moment you open your hand? You’re looking at sandy soil.
- Does it form a loose clump that holds its shape but crumbles easily when you poke it? Bingo. That’s the dream—loamy soil.
This simple feel test gives you instant, practical feedback. Clay is a champ at holding onto water and nutrients, but it gets compacted easily, which can suffocate plant roots. Sandy soil is the opposite; it drains so fast that water and vital nutrients often wash right past the roots before the plant has a chance to grab them.
A Deeper Look with the Jar Test
For a more detailed picture, the jar test is an old-school method that works wonders. It’s a simple science experiment that uses a basic mason jar to separate your soil into its three main components: sand, silt, and clay.
- Find a clear jar with a tight-fitting lid and fill it about two-thirds of the way with water.
- Add soil from your garden until the jar is roughly half full.
- Seal it up and shake it like you mean it for a couple of minutes. You want to break up all the clumps.
- Set the jar somewhere it won’t be disturbed and let the settling begin.
The heaviest particles, which is the sand, will drop to the bottom within minutes. Over the next few hours, you’ll see a layer of silt form on top of the sand. Lastly, the teeny-tiny clay particles will slowly settle out over the next day or two, leaving the water at the top.
By looking at the distinct layers, you can get a surprisingly accurate visual estimate of your soil’s makeup. This isn’t just for fun; knowing you’re working with 60% sand versus 60% clay will completely change how you approach improving it.
To make identifying your soil type even easier, here’s a quick cheat sheet.
Soil Type Characteristics and Quick Fixes
This table breaks down what you’re feeling, the main hurdle you’ll face, and the best place to start with amendments.
| Soil Type | Feel & Texture | Key Challenge | Primary Amendment |
|---|---|---|---|
| Clay | Sticky when wet, forms a hard, tight ball | Poor drainage, compaction, slow to warm up | Compost, pine bark fines, expanded shale |
| Sandy | Gritty and loose, won’t hold a shape | Dries out fast, poor nutrient retention | Compost, peat moss, aged manure, biochar |
| Silty | Smooth and almost floury when dry | Can become compacted and crusty | Compost, chopped leaves, coarse sand |
| Loam | Crumbly and dark, holds shape but breaks easy | The ideal balance—just maintain it! | Annual top-dressing with compost to maintain health |
This gives you a solid starting point. No matter what the jar test reveals, the answer almost always involves adding more organic matter.
Clearing the Way for a Fresh Start
While you’re getting your hands dirty, it’s also time to clear out any freeloaders—weeds, large rocks, and other debris. Giving your future plants a clean slate is non-negotiable. You want them to have zero competition for water and nutrients right from the get-go.

Make sure you get weeds out by the root. Just pulling the tops off is an invitation for them to come right back. A little extra effort now saves you a massive headache later. With a clear bed and a good idea of your soil’s texture, you’re ready to start thinking about its chemistry.
Uncovering Your Soil’s Hidden Chemistry

Now that you’ve gotten your hands dirty and have a good feel for your soil’s texture, it’s time to peek under the hood at its chemistry. This is where the real magic happens. The invisible world of pH levels and nutrient availability is ultimately what decides whether your plants flourish or just… exist. Getting this part right is a non-negotiable step in how to prepare soil for planting successfully.
The first, and arguably most important, number you need to know is your soil’s pH. It’s a simple scale from 0 to 14 that measures acidity and alkalinity. Right in the middle, 7.0 is neutral. Anything below that is acidic, and anything above is alkaline.
Most common garden plants—from tomatoes to roses—are happiest in a slightly acidic to neutral sweet spot, usually somewhere between 6.0 and 7.0.
Why is this little number so critical? Think of soil pH as the gatekeeper for nutrients. If the pH is too high or too low, essential minerals like nitrogen and iron get chemically locked up. They can be right there in the soil, but your plants simply can’t absorb them. It’s a frustrating problem that no amount of fertilizer can fix on its own.
Choosing Your Testing Method
You’ve got two main routes for testing: grabbing a DIY kit or sending a sample off for a professional lab analysis. There’s a time and place for both.
- DIY Test Kits: These are cheap, widely available at any garden center, and give you answers in minutes. They’re fantastic for a quick check on your pH and sometimes the basic N-P-K levels. Just know that the accuracy can be a bit hit-or-miss.
- Professional Lab Analysis: This is the gold standard. You mail a soil sample to a cooperative extension or private lab, and in return, you get a detailed report. It covers not just pH but also your exact nutrient levels, organic matter content, and even specific recommendations on what to add. It costs a bit more and takes a little longer, but for a new garden, the precision is worth every penny.
My advice? If you’re breaking ground on a new bed, invest in a lab test. For yearly check-ups on established gardens, a simple DIY kit will usually do the trick.
Understanding your soil’s chemistry is like getting a report card for your garden’s foundation. It tells you exactly what’s working and what needs improvement, taking all the guesswork out of the equation.
Decoding N-P-K: The Plant Macronutrients
You’ve definitely seen those three numbers on fertilizer bags, like 10-10-10 or 5-10-5. That’s the N-P-K ratio, and it tells you the percentage of the three most important macronutrients for plant life.
- Nitrogen (N): This is all about lush, green, leafy growth. Nitrogen is a key building block for chlorophyll, which plants use to convert sunlight into energy. If you see yellowing leaves, especially on the older, lower parts of a plant, a nitrogen deficiency is a likely suspect.
- Phosphorus (P): Think of phosphorus as the engine for roots, flowers, and fruit. It’s absolutely vital for establishing a strong root system and encouraging abundant blooms and produce. If your plants look healthy but just won’t flower, low phosphorus is often the culprit.
- Potassium (K): Potassium is the great defender. It acts like an internal regulator, helping plants manage water, fight off diseases, and build overall resilience. It strengthens stems and helps your plants power through stresses like drought or sudden temperature drops.
Knowing your soil’s N-P-K levels helps you feed your garden with intention. Instead of just throwing a generic “all-purpose” fertilizer at it, you can address specific needs. If your test shows you’re swimming in phosphorus but lacking nitrogen, you can choose an amendment that fixes that exact problem. This targeted approach is not only more effective, but it also saves money and builds a healthier, more balanced soil ecosystem for the long haul.
Choosing the Right Ingredients for Your Soil

Now that you’ve played detective with your soil, it’s time to put on your chef’s hat. Think of soil amendments as the ingredients for the perfect garden recipe. Your mission is to create a rich, living foundation for your plants, and that journey almost always begins with organic matter.
Honestly, adding organic material is the single best thing you can do for your garden. It’s not just about dumping in nutrients. It’s about fundamentally changing the soil’s structure, its ability to hold water, and the bustling microbial life within it. This is the real secret to how to prepare soil for planting the right way.
The Power of Organic Amendments
Organic amendments are simply materials that were once alive, and each one brings something unique to the table. The undisputed champion is compost. It’s the ultimate all-rounder, a beautiful, crumbly mix of decomposed organic goodness that improves literally every type of soil.
If you’re wrestling with dense, heavy clay, compost is a game-changer. It physically forces those tiny, sticky clay particles apart, creating crucial air pockets that improve drainage and let roots breathe. In sandy soil that drains in a flash, compost acts like a sponge, grabbing onto water and nutrients that would otherwise just wash away.
But the world of organic matter goes far beyond compost. Here are a few other power players to consider:
- Aged Manure: Sourced from animals like cows, horses, or chickens, well-rotted manure is a fantastic source of nitrogen. The key word here is aged. Fresh manure is way too “hot” and will scorch your plant roots.
- Leaf Mold: This is just what it sounds like—decomposed leaves. It’s an incredible soil conditioner, fantastic at retaining moisture, and creates the perfect five-star hotel for earthworms and beneficial microbes.
- Cover Crops: Gardeners often call these “green manure.” They are plants like clover or vetch that you grow specifically to till back into the soil. They’re a triple threat: they prevent erosion, choke out weeds, and give your soil a huge boost of organic matter and nitrogen.
Your choice of amendment should be a direct response to what your soil test told you. You’re not just adding stuff for the sake of it; you’re a soil surgeon, making targeted additions to create a balanced, thriving ecosystem.
Addressing Specific Soil Challenges
Let’s talk about some real-world situations. Say your jar test showed you have incredibly sandy soil. Your biggest headache is that water and nutrients just disappear. A great strategy here would be to work in a generous layer of compost mixed with coir or peat moss. The compost adds nutrients and structure, while the coir acts like a microscopic sponge, holding up to 10 times its weight in water.
Now, let’s flip the script. Imagine you have that heavy, sticky clay that turns into a swamp after it rains. Your goal is to break up that compaction and get some air in there. I’d recommend incorporating several inches of coarse, chunky compost. For really stubborn clay, adding expanded shale or even pine bark fines can create larger, more permanent air channels, transforming the soil’s texture over time.
This hands-on work in your own backyard is a small but powerful defense against a huge global problem. It’s estimated that a staggering 24 billion tons of fertile soil are lost worldwide every year. Those unsustainable practices strip away the organic matter that is vital for holding water and nutrients. By building up your own garden soil, you’re actively restoring your little piece of the planet. If you’re curious, you can find out more about the global impact of soil health on our planet.
When to Use Mineral Amendments
While organic matter is the star of the show, certain mineral amendments can play crucial supporting roles. They’re less about adding nutrients and more about permanently improving the soil’s physical structure.
- Perlite: This is volcanic glass that’s been super-heated until it pops like popcorn. Those little white, lightweight particles are fantastic for improving aeration and drainage, especially in potting mixes and heavy garden beds.
- Vermiculite: A natural mineral with a unique accordion-like structure, vermiculite is brilliant at holding both water and nutrients, releasing them slowly as your plants need them. It’s especially useful in seed-starting mixes.
Unlike compost, these minerals don’t break down over time, so the structural improvements they provide are long-lasting. By creating a smart cocktail of organic and mineral ingredients, you can build a resilient, fertile, and perfectly balanced foundation for your garden to thrive in for years to come.
The Final Steps in Preparing Your Garden Bed
You’ve done the testing and picked your amendments. Now it’s time to get your hands dirty and turn that patch of ground into a welcoming home for your plants. This is where the real work begins, and the first big question you’ll face is whether or not to till the soil.
For years, the standard advice was to fire up a rototiller to break up compacted earth and mix everything together. It’s quick, no doubt, and leaves you with a fluffy-looking bed. But we now know that aggressive tilling can do more harm than good. It pulverizes the soil’s delicate structure, decimates earthworm populations, and shreds the fungal networks that are vital for nutrient uptake.
That’s why so many experienced gardeners are shifting toward low-impact methods. You can still aerate and prep the soil beautifully without causing all that disruption.
Low-Impact Ways to Loosen Soil
Before you start adding anything, give the area a final once-over. Clear out any lingering weeds, making sure you get them by the root so they don’t pop right back up. With a clean slate, you can focus on gently loosening the soil.
Here are a couple of my favorite no-till alternatives:
- Broadforking: This is a fantastic manual method and a great workout. A broadfork has long, strong tines that you drive into the ground with your body weight. You then rock the handles back and forth, which creates deep channels for air and water without inverting the soil layers. It’s an incredibly effective way to relieve compaction.
- Lasagna Gardening: Also called sheet mulching, this technique is all about building soil from the top down. You layer organic materials—think cardboard, compost, shredded leaves, and straw—right on top of the ground. These layers decompose over time, smothering weeds and creating wonderfully rich, new soil.
Your goal here is to achieve a friable soil texture. That’s the word gardeners use for soil that’s moist and crumbles easily in your hand. It’s the perfect balance of air, water, and structure, allowing new roots to spread out with ease.
Mixing and Finishing Your Garden Bed
Once the soil is loosened, it’s time to add your amendments. Spread an even layer of compost, aged manure, or whatever you’ve chosen over the entire surface. A 2-3 inch layer is a solid starting point for most situations.
Now, grab a garden fork or a hard rake and gently work those amendments into the top 6-8 inches of soil. The key word here is gently. You’re aiming to integrate the new material, not churn everything into a uniform powder.
This careful preparation is more than just a one-time task; it’s an investment in your garden’s future. Practices like minimum tillage are crucial for preventing soil erosion. Intensive tilling has been shown to accelerate soil loss on a global scale, which you can read more about in studies detailing how farming techniques affect global soil displacement rates. By using conservation-minded methods in your own backyard, you’re helping preserve your soil for years to come.
For the final touch, use a rake to smooth the surface of the bed, breaking up any large clumps. You want a fine, even tilth that’s ready for planting. Your garden bed is now perfectly prepped and poised for a fantastic growing season. If this all feels a bit much, don’t worry—professional help is always an option. You can see the kinds of gardening services Stoke Gardening Services offers to get things started on the right foot.
Common Questions About Preparing Garden Soil
After all the testing and amending, you’re on the home stretch. But this is often where a few nagging questions pop up. Getting these details right is what separates a good garden from a great one. Let’s tackle some of the things people often ask right before they start planting.
The big one is always about timing. “How soon should I start prepping the soil?” I always recommend getting started at least 3 to 4 weeks before you plan to put plants in the ground. This isn’t an arbitrary number; it’s the perfect amount of time for amendments like compost or manure to really start meshing with your existing soil, creating a stable, living foundation for those new roots.
Fine-Tuning Your Approach
Gardeners also frequently ask for advice on tackling really troublesome soil types, especially heavy clay. If your soil is sticky, dense, and a pain to dig, the answer is always the same: organic matter, and lots of it. Compost is your best friend here. It works its way between those tiny, packed-down clay particles, forcing them apart to create space for air and water.
I’ve seen this mistake so many times: people add sand to heavy clay thinking it will lighten the load. It’s a disaster. You end up with something closer to concrete than garden soil. Just stick with compost—it works every time.
Then there’s the question of “Do I have to do all this work every single year?” Thankfully, no. That first big push is the hardest part. Once you’ve done the initial heavy lifting, future years are all about maintenance. A simple top-dressing of an inch or two of fresh compost each season is usually all it takes to keep the nutrient levels up and the soil structure healthy. For more hands-on help and expert advice, you can always explore our gardening solutions at Stoke Gardening Services.
This annual refresh is more than just feeding your plants; it’s about preserving the soil itself. It’s a sobering thought, but studies have found that about 16% of conventionally farmed soils are at risk, with a potential lifespan of under 100 years due to erosion. Simple habits like adding compost and disturbing the soil less can make a world of difference. You can discover more insights about soil lifespans and see why these practices are so crucial.
Contact us here for quotes and Bookings.
Responses
[…] your garden bed with plenty of organic matter like compost is crucial. You can find more details on how to prepare soil for planting on our […]
[…] This prevents root rot during our wet winters. If you want to dive deeper, you can learn more about how to prepare soil for planting in our detailed […]
[…] Organic fertilisers come from natural stuff like compost. They do more than feed the grass. They improve the soil’s structure and support tiny microbes. Before adding anything, it is a good idea to learn how to properly prepare your soil for planting. […]
[…] For those of us gardening here in Stoke-on-Trent, good quality compost is easy to find. However, getting your hands on good organic matter is a crucial first step. We cover it in more detail in our guide on how to prepare soil for planting. […]
[…] After you’ve found the perfect spot, it’s so important to get the foundation right. That means preparing soil for planting to give the roots the best possible start. Honestly, this simple step can make all the difference […]
[…] found the perfect spot, it’s so important to get the foundation right. That means preparing soil for planting to give the roots the best possible start. Honestly, this simple step can make all the difference […]
[…] This system produces a high-quality soil amendment. It dramatically improves soil structure. Once your compost is ready, you can incorporate it into your garden beds. For more guidance on soil enrichment, check out our guide on how to prepare soil for planting in Stoke-on-Trent. […]
[…] Water Consistently: Keep newly seeded areas moist until the grass is established. This involves light watering daily for the first couple of weeks. You can learn about how to prepare soil for planting in our guide. […]
[…] Getting the soil right is the foundation of everything. If you want more details, learn how to prepare soil for planting in our detailed guide. […]
[…] Remember, a healthy plant recovers well from pruning when it’s growing in good soil. If you want to give your flowers the best foundation, check out our guide on how to prepare soil for planting. […]
[…] Finally, don’t forget local quirks. Stoke-on-Trent’s clay-heavy soil demands specific know-how. You should ask about past work in similar conditions. If you want a deeper dive, check out our guide on How to Prepare Soil for Planting. […]
[…] Multi-level beds are a fantastic solution for limited spaces. They draw the eye upward, creating an illusion of depth. Additionally, they provide superior drainage. You can also control the soil composition for different plants. This is useful if your native soil is poor. By giving each plant its ideal environment, you can enjoy a healthier garden. To get started, you can explore more on how to prepare soil for planting on stokegardening.co.uk. […]
[…] To achieve a minimalist look, the focus shifts from variety to impact. Firstly, choose a limited colour scheme. Often, this means sticking to greens, whites, and one accent colour. Then, use mass plantings of single species. This creates bold, unified blocks of texture and colour. Proper soil preparation is also crucial for these plantings to thrive; find out more about how to prepare soil for planting in Stoke-on-Trent. […]
[…] Our expert construction also ensures your beds are perfectly level and secure. A well-built bed is the foundation of a great garden. In addition, it all starts with getting the soil right. For more on that, check our guide on how to prepare soil for planting. […]
[…] A keyhole garden is a fantastic choice for a productive, water-wise garden. The initial construction takes some planning. However, the long-term benefits are substantial. It’s a perfect project for a Stoke-on-Trent garden where you want to grow vegetables. Our local team can help you build a durable and attractive keyhole garden. Understanding this system provides insights into how to prepare soil for planting. […]
[…] have a complete guide that goes into much more detail on how to prepare soil for planting. It has specific tips for local soil conditions. If it all feels a bit overwhelming, our […]
[…] soil is the foundation of healthy plants. You can learn more about how to prepare soil for planting on our blog. For expert assistance in Stoke-on-Trent, our gardening services are here to […]
[…] Think of it like building a house – you need a solid foundation. For plants, that foundation is the soil. Therefore, putting effort into preparing the ground properly is crucial. This will pay you back for years with healthier, more vibrant shrubs. If you’re not sure where to start, see our helpful guide on how to prepare soil for planting. […]
[…] with the soil. If you’re looking to get the foundation right, you might find our guide on how to prepare soil for planting really […]
[…] Getting the soil right is the most important first step. We’ve put together a full guide on how to prepare soil for planting that’s packed with tips to give your new flowers or shrubs the best […]
[…] Holding the tree steady, start backfilling around it with your soil mix. As you go, gently firm the soil down with your hands. This gets rid of any big air pockets lurking around the roots. Just don’t compact it into a brick! If you want a quick refresher on getting that soil mix just right, we have a detailed guide on how to prepare soil for planting. […]
[…] planning a new flower bed, this is the perfect time to think ahead. You can learn more about how to prepare soil for planting to give your new plants the best possible […]
[…] matter. This lightens up the heavy clay and improves airflow. For a deeper dive, our guide on how to prepare soil for planting is a great […]
[…] If planting in pots, make sure they have drainage holes. For garden beds, it’s crucial to prepare your soil for planting to ensure it drains […]
[…] giving your plant the best possible start. For a deeper dive into soil, check out our guide on how to prepare soil for planting. Getting these essentials right is the first, most important step toward a happy, thriving, and […]
[…] you get started, it’s always a good idea to make sure your soil is in top shape. Our guide on how to prepare soil for planting is a great place to start. A bit of prep work combined with a smart rotation plan is the secret to […]
[…] If you’ve ever battled waterlogged flowerbeds after a classic Potteries downpour, you know exactly what I mean. Working compost into your soil is the answer. We go into more detail on this in our guide on how to prepare soil for planting. […]
[…] For a really detailed breakdown of this process, check out our guide on how to prepare soil for planting. […]
[…] Once you have the right soil picked out, the last step is prepping the area. To make sure you get it right from the start, I highly recommend this expert guide on how to prepare soil for planting. […]
[…] a really detailed breakdown, have a look at our guide on how to prepare soil for planting. It’s a bit of hard graft, but getting your soil right from the start is the foundation for a […]
[…] build soil health from the ground up. The principles behind it are closely related to how you would learn to prepare your soil for planting, focusing on creating a rich, living foundation for your garden to […]
[…] We believe in being upfront about everything. Your proposal will clearly outline the project scope and all the steps involved, so you know exactly what’s happening and when. The goal is to create a plan that you’re completely thrilled with before we even pick up a spade. Getting the groundwork right is everything; you can get a head start by reading our guide on how to prepare soil for planting. […]
[…] Nailing this blend is the key to creating the perfect growing environment. For more in-depth advice tailored to our local conditions, you should check out our guide on how to prepare soil for planting. […]
[…] Before you start spreading mulch, make sure the area is well-prepared. Proper soil preparation is key to success, and you can learn more about how to get your soil ready for planting here. […]
[…] Wicking Medium: A geotextile fabric separates the water reservoir from the soil layer. The soil itself acts as the wick, but ensuring you have the right composition is vital. To learn more about getting the mix just right, explore our guide on how to prepare soil for planting. […]
[…] In some situations, we might also add a very light top dressing—a thin layer of quality compost or screened topsoil. This little extra step improves seed-to-soil contact even more, helps retain moisture, and adds great organic matter back into your lawn’s ecosystem. If you want to learn more about building a great foundation for any plant, have a look at our guide on how to prepare soil for planting. […]
[…] Aconites. For advice on amending your garden beds to create the perfect conditions, our guide on how to prepare soil for planting can help. Let our Stoke-on-Trent gardening team assist in designing a stunning winter […]
[…] Adding this material works wonders for the soil structure. It creates tiny air pockets, which dramatically improves drainage and stops roots from drowning in cold, wet earth. It also acts as a slow-release fertiliser, feeding your plants throughout the lean winter months. If you want to get really into the details, have a look at our comprehensive guide on how to prepare soil for planting. […]
[…] This knowledge helps you select plants that will naturally do well, and it tells you exactly how to amend the soil for those must-have plants that need a little extra help. It’s a foundational piece of the puzzle you need before you even think about digging. For a deeper dive into getting your garden beds prepped, take a look at our guide on how to prepare soil for planting. […]
[…] move-in also depends on having the house ready. A crucial first step for any planting project is preparing your soil for planting. Getting the soil just right gives your new hostas the best possible head […]
[…] This is also the perfect moment to give your soil a boost. Here in Stoke-on-Trent, we deal with a lot of heavy clay. Working in a good layer of compost or well-rotted manure does wonders for drainage and gives your plants a slow-release feed. Just spread a couple of centimetres over the surface before you mulch. For a deeper dive, check out our guide on how to prepare soil for planting. […]
[…] with is the first step to making it better. If you’re not sure where to begin, our guide on how to prepare soil for planting has some great local […]
[…] This long-term investment means your garden will be far better equipped to handle the unique Staffordshire climate. Our own hands-on experience right here in the Stoke-on-Trent area has proven time and again that building great soil is the absolute first step to a beautiful, productive garden. For some practical tips to get you started, have a look at our guide on how to prepare soil for planting. […]
[…] a bog, which is vital for new roots. We’ve got a whole guide on this, and you can learn how to prepare soil for planting in our dedicated […]
[…] Expert Insight: The River Birch is one of the best plants for wet soil because it actively improves the landscape it inhabits. Its vigorous root system helps stabilise soil on banks and slopes, reducing erosion while absorbing excess ground moisture. Proper site preparation is key to its success; ensuring the soil is ready will give it a strong start. For detailed guidance, you can explore our advice on how to prepare soil for planting. […]
[…] For a garden that truly looks its best, sorting out the soil is job number one. Our guide on how to prepare soil for planting has plenty of practical tips for dealing with the classic clay we have in this […]
[…] sinking over time. Good soil prep is a skill that pays off everywhere in the garden, and you can check out our guide on how to prepare soil for planting for more on […]
[…] This long-term investment means your garden will be far better equipped to handle the unique Staffordshire climate. Our own hands-on experience right here in the Stoke-on-Trent area has proven time and again that building great soil is the absolute first step to a beautiful, productive garden. For some practical tips to get you started, have a look at our guide on how to prepare soil for planting. […]
[…] with is the first step to making it better. If you’re not sure where to begin, our guide on how to prepare soil for planting has some great local […]
[…] we handle your weeding and planting, we look at how to maximise this “stacking” effect to create privacy and […]